How to Encrypt Local Backups of an iPhone or iPad on Windows
Before, taking you through the quick steps, I would like to highlight a few notable points worth checking off upfront. If you are familiar with the basics, you can start with the steps right away using the table of content below.
Difference Between Encrypted and Unencrypted iPhone and iPad Backup
Precisely speaking, the major difference between the encrypted and unencrypted iPhone and iPad backup on the computer is the included data. The encrypted backups are locked/encoded and include information like:
Your saved passwords (excluding the Face ID, Touch ID and device passcode data) Wi-Fi settings Website history Call history Health data
Apart from letting you password-protect your data, the encrypted backup feature also lets you backup sensitive information, which is why it’s so essential. On the contrary, the unencrypted backups are less secure and don’t include information like health and saved passwords.
What’s the Advantage of Taking Local Backup of iPhone and iPad on Computer?
While backing up iPhone via iCloud is incredibly easy, Apple offers just 5GB of free cloud storage, which is too little for all the photos, videos, music, and all the files stored on your device. The limited free cloud storage aside, you can’t restore your device from iCloud backup without first erasing the device, which is a tedious affair. On the other hand, if you have a local backup of your device on your computer, you can restore your iPhone or iPad from the backup as and when you want. That’s super convenient.
Take Encrypted Back Up of iPhone and iPad Using iTunes on Windows
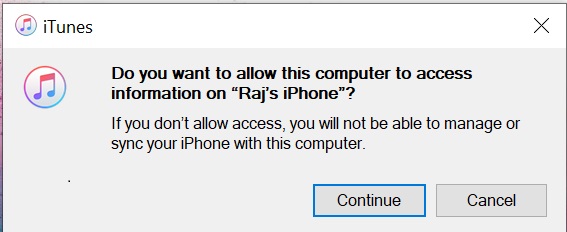
- You may get a prompt saying “Do you want to allow this computer to access information on your device?”, click on Continue to proceed.
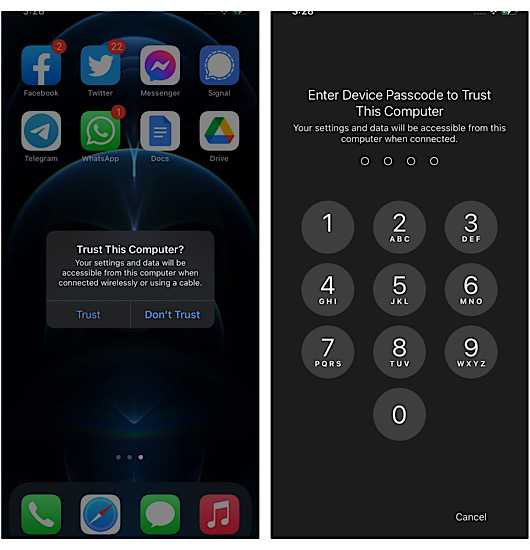
Besides, you will also get a popup on your iOS device asking you to trust the computer. Tap on Trust in the popup and then enter the device passcode.
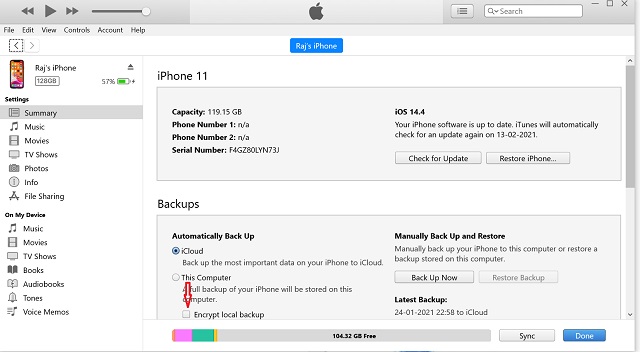
Now, select your device at the top left corner of the screen.
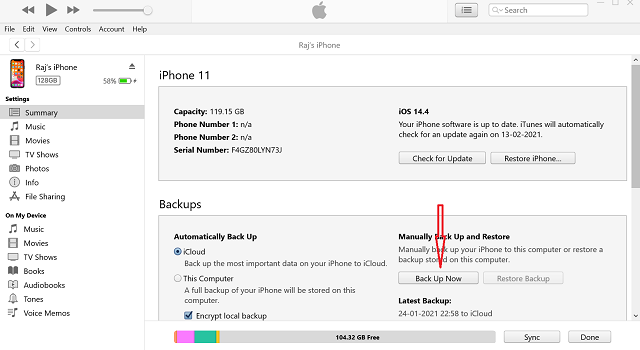
Next, check the box to the left of Encrypt local backup.
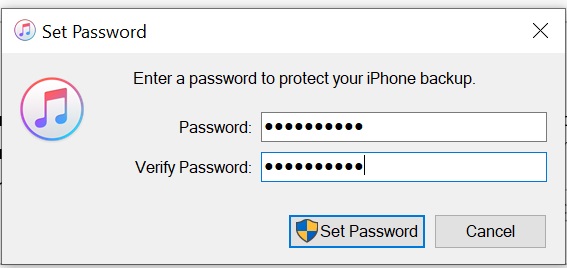
Next up, enter the password to protect your device backup and then click on Set Password.
Finally, click on Back Up Now option. Then, let your device be backed up securely. The time it will take to back up your device depends on the amount of storage.
You can check the backups stored on your computer by going to Edit -> Preferences -> Devices. The encrypted backups feature a lock icon.
How to Restore Your iPhone or iPad from Encrypted Backup on Windows
The process of restoring the iPhone and iPad from encrypted backup is just as easy.
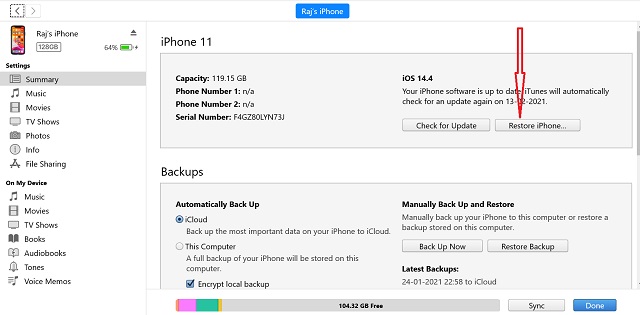
Now, select your device.
Next, click on Restore Backup. Then, select the preferred backup and then enter the password for the encrypted backup.
Back and Restore iPhone and iPad Using Windows Computer with Ease
With the introduction of macOS Catalina, Apple broke iTunes into three separate apps like Music, Podcasts, and TV. Besides, Finder assumed the role of the iPhone and iPad manager allowing users to back up, restore, and sync the iOS device on Mac. However, the tech giant continues to make iTunes available on the older versions of macOS and Windows. But we can’t be sure for how long Apple will support this, so be sure to check out our favorite iTunes alternatives. Also, don’t forget to share your thoughts on the matter in the comments below.